


How Precision Embossing Dies Improve Foil Stamping Consistency
How Precision Embossing Dies Improve Foil Stamping Consistency
Foil stamping problems are often blamed on the press: uneven heat, inconsistent pressure, foil quality, or operator setup. Those factors matter, but they are only part of the picture. In premium folding cartons, presentation boxes, book covers, labels, and promotional print, a large share of repeatability is determined before the sheet reaches the stamping press. It is determined by the geometry, machining quality, mounting accuracy, and working surface of the embossing die.
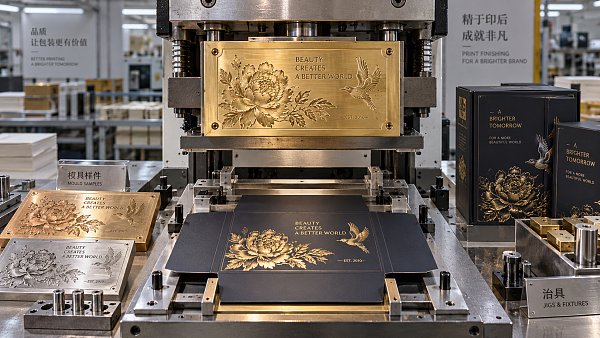
A precision embossing die does more than create raised relief. When foil stamping and embossing are combined, the die becomes the interface that controls how heat, pressure, foil adhesive, printed image, and substrate behavior meet at the same point. If that interface is not accurate, a press may still produce acceptable samples during setup, yet drift into weak foil coverage, crushed detail, registration variation, or inconsistent emboss height during a long run.
For technical evaluators, this is the practical question: can the tooling maintain the intended result across real production conditions, including material variation, press speed changes, repeat jobs, and operator handover? The answer depends less on a single “high-quality die” claim than on how the die, counterforce, foil, artwork, and press are engineered as a working system.
Why foil stamping consistency is a tooling issue
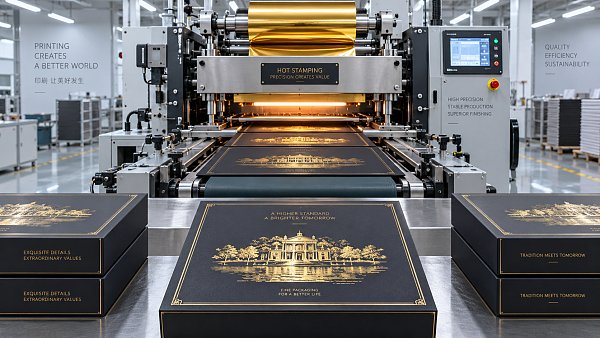
In a conventional hot foil process, the heated die presses foil against the substrate. Heat activates the foil’s adhesive layer, and pressure creates intimate contact so that the metallic or pigmented layer transfers cleanly. In foil embossing, the process is more demanding because the sheet is also formed into relief. The substrate must stretch, compress, or redistribute its structure while foil transfer is taking place.
That is why a setup can show good foil coverage but poor relief, or strong embossing with broken foil edges. The press is not performing two independent operations. It is managing a narrow process window where thermal transfer and material forming must happen together.
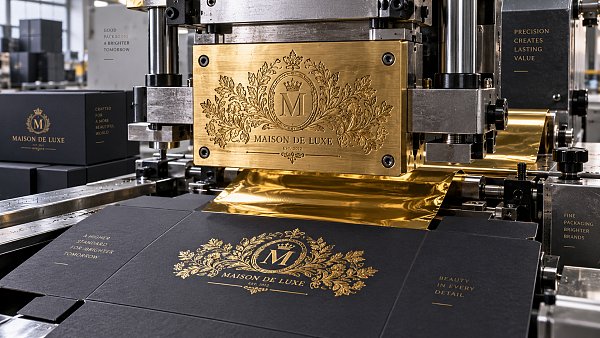
A precision embossing die helps stabilize this window through predictable contact. Its relief depth, land area, wall angle, corner radii, and surface finish are produced to match the artwork and the expected substrate response. The die should not force the board to deform abruptly at one point while applying insufficient contact at another. On fine lettering, small logos, line art, or intricate security-style patterns, minor inconsistency in these surfaces can become visible immediately.
This matters especially on brand packaging where the foil element must align with offset, flexographic, or digital print. A metallic emblem that is visibly shifted from the underlying print may be rejected even when the carton’s structural die-cutting and folding are otherwise correct. Technical teams therefore need to evaluate foil stamping as part of the complete post-press registration chain, not as an isolated decorative operation.
The die features that affect repeatability
The term precision embossing die is sometimes used too loosely. Precision is not simply a matter of making a die from a premium material. It concerns whether the tooling geometry is controlled, documented, and suited to the job.
Relief depth is one obvious consideration. Deep embossing may look impressive on a rigid board, but it increases the risk of foil fracture, paper fiber stress, and uneven transfer around narrow corners. A shallow emboss can be more stable in production, particularly for coated folding cartonboard, but may not provide the tactile effect expected by the brand owner. There is no universal “best” depth; the decision must consider board caliper, fiber direction, coating, printed ink build, foil construction, and visual expectations.
Wall angle and transition radius are equally important. Extremely sharp transitions can make an embossed graphic look crisp, yet they concentrate pressure and make the foil less forgiving. A controlled radius often improves foil continuity because it allows the substrate and foil to form gradually. This is one of the less obvious trade-offs in luxury packaging: the sharpest-looking tool design is not always the most stable design at production speed.
The working face must also be consistent across the image area. If raised surfaces are uneven, pressure is redistributed unpredictably. Operators may then compensate by increasing overall impression pressure or temperature. That can temporarily hide one weak area while creating new defects elsewhere, such as excessive gloss change, distorted printed solids, crushed texture, or foil pickup beyond the intended edge.
For fine text and small repeated motifs, machining accuracy affects more than appearance. It determines whether internal counters remain open, whether serifs hold their form, and whether adjacent foil areas bridge together. These defects are easy to miss on one sheet under normal factory lighting. They become much more obvious when cartons are stacked, inspected under angled light, or compared with a brand approval sample.
Registration starts with the die, not with press adjustment
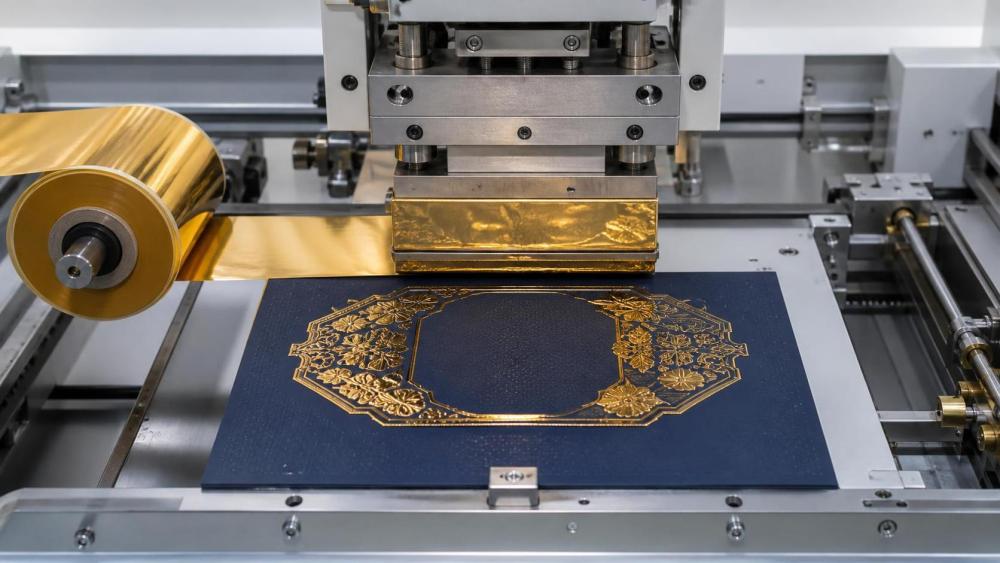
Foil-to-print registration is commonly discussed as a feeder and press alignment issue. It is that, but only after the die itself has been made and mounted correctly. A well-calibrated feeder cannot correct artwork position errors in the tooling, unstable mounting, or an emboss counter that causes the sheet to shift under load.
In practical production, registration stability depends on several linked references: printed sheet position, gripper or lay edge, die mounting position, foil feed path, and counter or matrix alignment. Each reference may be acceptable on its own while the combined error exceeds the tolerance of a narrow keyline or fine metallic border.
A precision die gives the press team a reliable reference point. It should be manufactured from approved production artwork, account for the press format and mounting method, and be checked against the intended repeat geometry. Where a job includes both embossing and foil stamping, the relationship between the die and its counterforce must be maintained throughout setup. A counter that is slightly offset may produce one-sided foil weakness or a raised image that appears to lean toward one edge.
This is particularly relevant in short-run work with frequent job changes. A converter may be able to obtain a satisfactory first sheet through careful manual adjustment, but repeatability on the next shift or the next reorder depends on whether the tooling and make-ready instructions preserve those settings. Good tooling reduces the amount of “operator memory” required to recreate the result.
Uniform pressure is not the same as high pressure
When foil transfer is incomplete, the instinct is often to add pressure. That may solve a simple contact problem, but it is a poor universal remedy. Excess pressure can flatten embossed relief, mark coated stock, widen fine foil lines, distort small type, and accelerate wear on counters or packing materials.
The better objective is uniform, purposeful pressure distribution. A properly designed die transfers the required force into the intended areas without creating excessive local loading. Its interaction with the counterforce is central here. Depending on the process, the counter may be a matched metal counterpart, a prepared polymer counter, or another suitable make-ready arrangement. The appropriate choice depends on detail level, run length, substrate behavior, and the press configuration.
For example, a broad embossed panel and a fine crest rarely behave the same way. The broad area needs even support to avoid a patchy surface or visible low spots. The crest needs controlled definition without crushing adjacent printed detail. Treating both elements with one global pressure setting often creates compromise rather than consistency. Tool design and make-ready need to recognize where the job is most sensitive.
Technical review should also include platen condition, packing uniformity, and die mounting flatness. A highly accurate die cannot compensate for a worn press surface or irregular packing. Conversely, repeatedly adjusting press pressure to overcome a tooling defect can mask the root cause and make future jobs harder to standardize.
Heat transfer, foil selection, and substrate behavior
Foil transfer is a thermal event, but the die determines how that thermal energy reaches the sheet. Consistent die contact helps reduce variation in dwell and heat exposure across the image. It does not eliminate the need to select the right foil, yet it makes foil behavior more predictable.
Different foils are formulated for different substrates and operating conditions. A foil that performs well on a smooth coated cartonboard may not transfer cleanly onto a textured paper, heavily inked area, laminated sheet, or stock with variable moisture content. The same is true of board stiffness. A substrate that resists deformation may require a different emboss strategy from a softer board that forms readily but is more prone to surface marking.
Print coverage complicates the process further. Dense ink areas, varnishes, coatings, and laminates change the surface presented to the foil. In some projects, the question is not whether foil can transfer, but whether it remains consistent across printed and unprinted zones of the same design. This should be tested on representative production stock, not only on a clean sample sheet supplied during development.
Moisture and grain direction also deserve attention. Paper-based materials respond to heat and pressure differently as their condition changes. A die design that works comfortably on one board batch can become marginal if the material is stored poorly or substituted without process review. That is why quality teams should record the stock grade, coating condition, grain direction, foil grade, die reference, counter setup, and key press settings for repeat jobs.
Where converters lose consistency in real production
The most expensive foil stamping faults are not always obvious catastrophic failures. More often, they are gradual variations that generate sorting, slower running, customer queries, or rework at the folder gluer stage. A carton can appear acceptable as a flat sheet but reveal cracked foil at a fold, poor visual alignment after erection, or inconsistent shelf appearance when packed alongside other units.
Common warning signs include foil coverage that weakens at one side of the sheet, inconsistent gloss in solid metallic areas, halo-like transfer around fine artwork, loss of detail in small characters, and emboss relief that differs between the first and last sections of a run. None of these symptoms automatically proves the die is at fault. They should trigger a structured review of tooling, counter alignment, press condition, foil path, sheet handling, and substrate consistency.
It is also worth separating tooling life from acceptable tooling life. A die may still physically function after extended use, yet no longer hold the fine definition or pressure balance required for a demanding brand job. The decision to replace or refurbish tooling should be based on inspection and production evidence rather than an arbitrary calendar interval.
A practical evaluation framework for technical teams
Before approving a foil embossing setup, technical evaluators should examine the full conversion path. The relevant question is not merely whether the stamped sheet looks attractive at make-ready. It is whether the result remains acceptable after die-cutting, creasing, folding, gluing, transport, and final packing.
- Confirm that die artwork, printed artwork, and structural layout use the same approved reference and revision.
- Review the smallest foil details, narrowest gaps, sharpest corners, and closest registration relationships; these areas usually define the real process limit.
- Test on the actual board, print finish, and coating combination intended for production whenever possible.
- Assess foil coverage and relief under angled light, not only from a direct overhead view.
- Check finished cartons after folding if foil crosses or approaches a crease line.
- Document repeat-job settings, counter preparation, die location, and inspection observations so that performance is not dependent on one experienced operator.
This systems view is increasingly relevant in packaging plants that are investing in connected equipment, job scheduling, inspection, traceability, and automated end-of-line handling. As converters manage shorter runs and more frequent changeovers, stable tooling becomes part of operational control. It can reduce the time spent chasing cosmetic variation and make inspection data more meaningful because the process has a firmer baseline.
For the commercial printing and corrugated packaging sectors covered by CPCS, post-press quality cannot be separated from upstream production discipline. Print registration, board condition, die-cut accuracy, crease placement, foil stamping, and folder-gluer performance all influence finished-pack quality. A precision embossing die is not a cure for poor process control, but it is one of the components that makes controlled production possible.
The useful standard is repeatable appearance, not a perfect sample
The strongest foil embossing setup is not necessarily the one that creates the deepest relief or the brightest first-sheet transfer. It is the one that delivers the approved visual effect with reasonable operating tolerance across the production run. That usually comes from a die designed around the actual artwork and substrate, a properly matched counterforce, disciplined registration control, and realistic process trials.
When a job is technically demanding, the die should be reviewed early—before print approval and before the production schedule becomes fixed. Late-stage press adjustments can solve minor variation. They cannot reliably compensate for tooling geometry that asks the foil, sheet, and press to do incompatible things at the same time.
Related News
 When a Custom Embossing Die Delivers Better Packaging DetailDiscover when a custom embossing die adds premium tactile detail, sharper branding, and repeatable packaging quality for cartons that stand out on shelf.Post-Press Kinematics Expert
 What to Compare Before Buying a Luxury Rigid Box Making MachineCompare a luxury rigid box making machine by usable throughput, automation, quality consistency, lifecycle cost, and supplier support to protect premium packaging margins.Post-Press Kinematics Expert
 What Determines Window Patching Machine Price for Packaging LinesWindow patching machine price depends on speed, accuracy, film compatibility, automation, and support. Compare total costs to choose the right packaging solution.Post-Press Kinematics Expert
 What Drives the Cost of a Custom Foil Stamping DieCustom foil stamping die costs explained: compare materials, artwork complexity, die size, run length, and press requirements to choose durable, cost-effective tooling.Post-Press Kinematics Expert
 What to Compare Before Buying Hot Foil Stamping MachinesHot Foil Stamping Machines: compare quality, registration, setup time, foil compatibility, and uptime to choose a press that delivers profitable, repeatable results.Post-Press Kinematics Expert
 How to Choose Foil Stamping Dies for Consistent Fine DetailFoil Stamping Dies: learn how to select the right material, relief, and press compatibility for crisp fine detail, reliable registration, lower waste, and consistent packaging quality.Post-Press Kinematics Expert